There’s 4 things about Central Florida that you just can’t avoid. It’s hot, it can get windy, there’s a lot of bugs and at some point you’re going to need a pool enclosure screen repair.
Many residents have pools and only a handful are brave enough to not have a pool enclosure over the top of them. Those who don’t have a pool, often times have some sort of screened in porch to allow them to sit outside without getting eaten by mosquitoes. Unfortunately, just like almost everything, there is a shelf life on how long those screens are going to last before holes start showing up.
Depending on direct sunlight, you can expect to get 10-15 years out of your screen before you’re going to have to look at replacing them. A good way to tell is by color believe it or not. If you’re starting to see silver where it was once a dark charcoal color, then you know you’re getting close to needing a screen repair.
When the pool screen begins to lose it’s color, it becomes brittle. If you have trees over your pool enclosure, anything that may drop out of them can create a hole. Many have stepped outside and found animals such as a squirrel running around only to look up and see they fell through a top panel.
As much as people value their landscapers, because who really likes doing yard work in 100 degree weather, without fail, they’re going to take out a bottom panel here and there around the pool. Often time you don’t even notice this because of where the weed eater hits the screen.
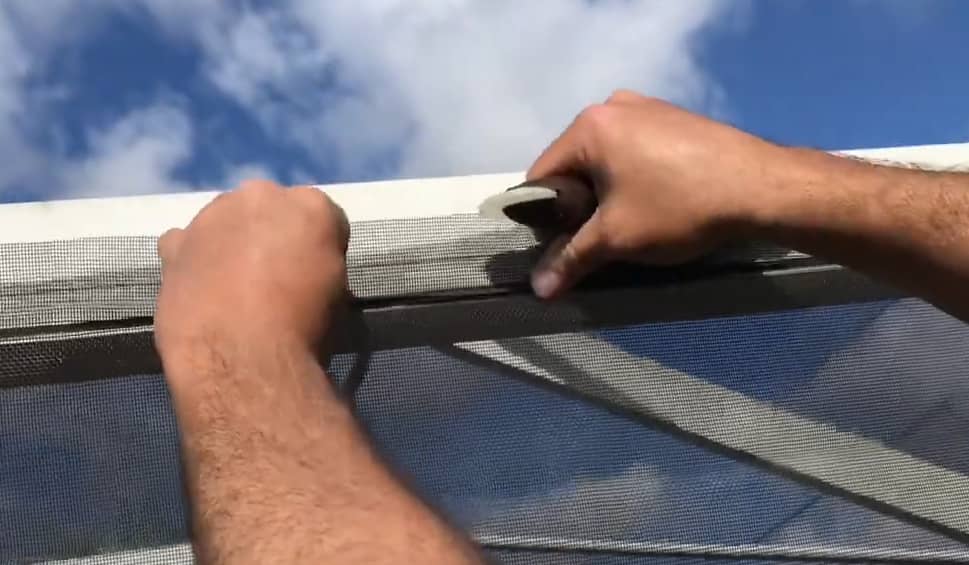
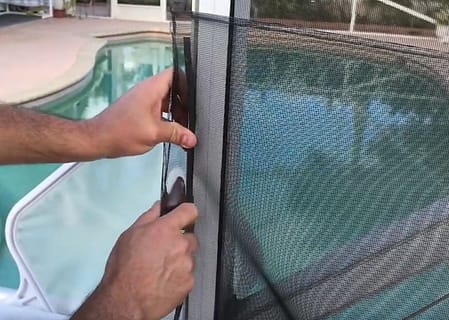
The metal 1×2 at the bottom does a pretty good job of hiding these holes if looking from the inside, so it’s always a good idea to walk around the outside of your enclosure for inspection. Look at the very bottom where the metal meets the bottom of the screen and you’ll see a very clean cut. Often times, especially if the screen is newer, you may not even see it unless you push on it.

Your pool enclosure doors are another place to check, especially by the handle. So often residents will reach out for the handle and catch a bit of the screen in the process. This can cause a fine tear right along the area where the spline attaches the screen to the door. You may not even notice it, but the bugs will.
As the screens get older, wind can also create these fine tears in the pool enclosure screen along the top and side panels. Again, you may not even notice it if the wind isn’t blowing as the tear is so perfect, it just looks like the panel is in place. Make a habit of running your hand along the vertical sides of the side panels once a month to check and see if there’s any tears. You can also step outside when the wind is blowing decently and you’ll know if you have a tear somewhere.
While pool enclosures are a gift that save us from the bugs here in Central Florida, they’re only as good as the screen you put in them. Yes, all screen works at first but how long it’s going to work for is another thing. Quality materials are must to get the proper time frame out of your screen. Yes, there’s always “cheaper” materials, but this is one place that you truly get what you pay for. We use only Phifer materials as they have been the best in the industry for over 70 years.
Cheap screen has less than half the amount of shelf life up against the elements we have in Central Florida compared to quality materials. In the summertime, we can get spot storms that can easily produce 50 mph winds. With inferior materials, this is more than enough to cause tears. You may have paid less at first, but you’ll wind up paying more when you have to have the job done twice.
Pool screen replacement is just part of life here in Florida, but if you keep up with inspecting your screens and use quality materials, you’ll enjoy the protection from the bugs for a long time.
For more information, have a look at Understanding the cost of installing a pool screen enclosure here
